
Managing billing in Google Ads is essential for running smooth, uninterrupted ad campaigns. Whether you’re a business owner or a digital marketer, understanding how Google charges you for ads and setting up your payment methods is crucial to ensuring your campaigns run without a hitch. In this guide, we’ll walk you through the entire process of setting up billing for Google Ads, breaking down each step to make it as straightforward as possible.
Let’s dive into how Google Ads billing works and how to set it up correctly.
Understanding How Google Charges for Ads
Before we get into the actual setup process, it’s important to know how Google charges you for advertising.
Google offers a simple and transparent payment system, where you’ll either be charged:
- At the End of Each Month – Google charges you on the same day every month for the ads you’ve run during that billing cycle.
- When You Reach Your Payment Threshold – Google assigns you a threshold, which is the amount you can spend before your payment is due. For instance, if your threshold is set at £500, once your account reaches this amount, Google automatically charges your payment method.
This system ensures that you don’t get overcharged or miss out on any unexpected billing surprises. You are billed when you reach the threshold or when the month ends, whichever comes first.
Step-by-Step Guide to Setting Up Google Ads Billing
Now that you understand the basics, let’s walk through how to set up your billing account in Google Ads.
Step 1: Navigate to "Tools and Settings"
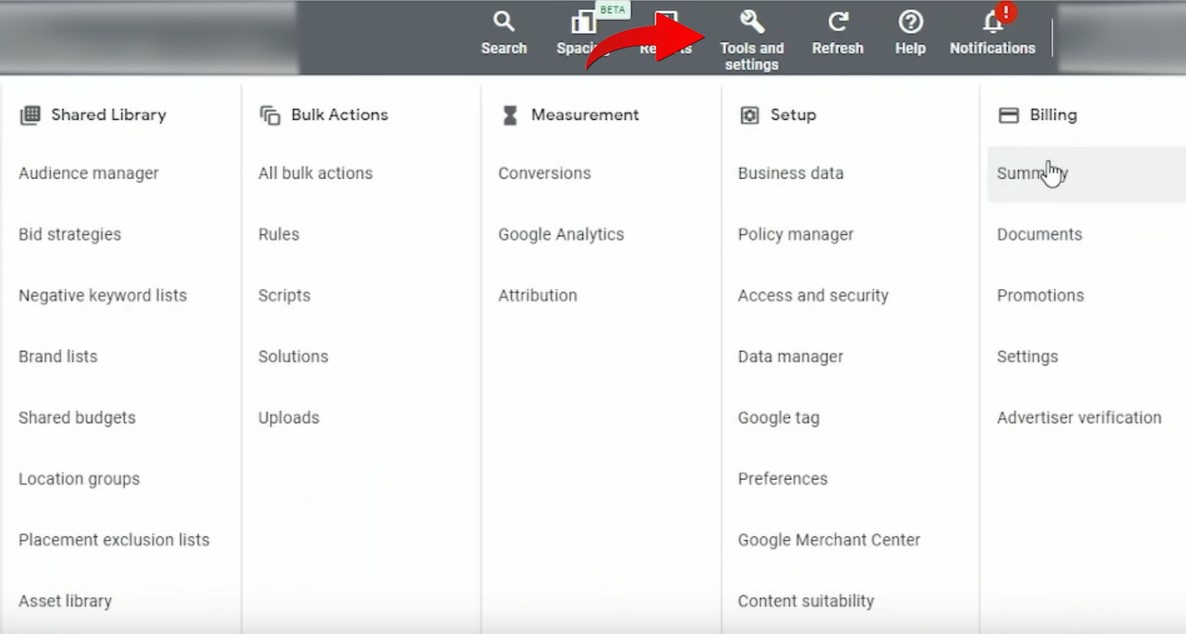
To begin, you need to log in to your Google Ads account. Once inside your dashboard, head over to the navigation bar. At the top-right corner, click on the wrench icon labeled “Tools and Settings.” This will open a drop-down menu with various options related to managing your Google Ads account.
Step 2: Access the Billing Summary
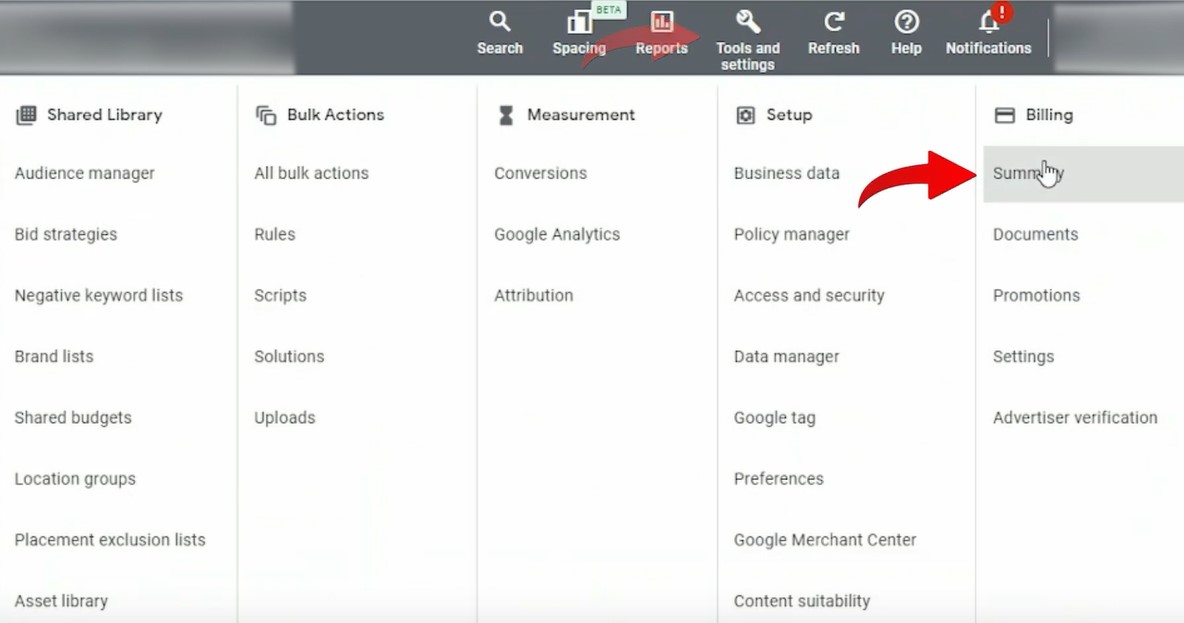
Under “Tools and Settings,” find and click on the “Billing” option, which will lead you to the billing section. From here, click on “Summary.” This page will give you an overview of your current billing information, and you can view or download invoices for your records, something especially useful for tax purposes.
Step 3: Add or Edit a Payment Method
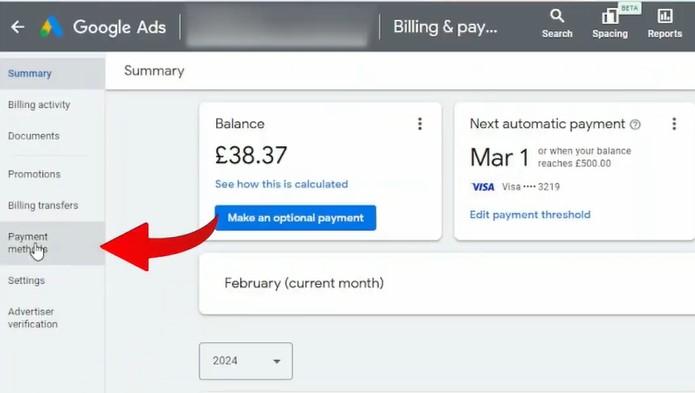
To set up or change your payment method, go to the “Payment Methods” tab. Here, you can add a new card or update existing card details.
On this screen, you’ll see any current cards you have on file. If you’re setting up billing for the first time, there might be no card listed. In either case, you have two main options:
- Add a New Card: To add a debit or credit card, simply click the “Add New” button. From here, you’ll be asked to enter your card details such as the card number, expiration date, and security code.
- Edit Existing Payment Methods: If you’ve already added a card but want to update or remove it, you can do so on this screen. Just click “Edit” next to the card details you want to change, and you’ll be able to adjust your information.
Important Note
Google currently accepts only debit or credit cards as payment methods. While other options such as direct debit or bank transfer used to be available, Google has since streamlined the process to accept only card payments.
Step 4: Add a Backup Payment Method
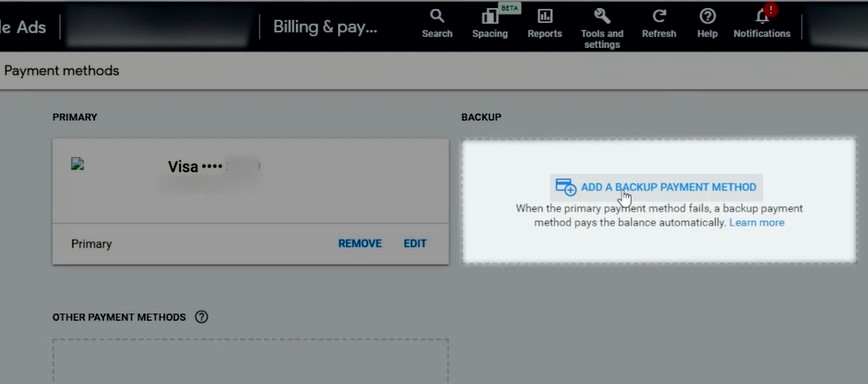
To avoid any issues with failed transactions, Google allows you to add a backup payment method. This is a secondary card that will be charged if, for any reason, the primary payment method fails.
To add a backup card, simply click “Add Backup Payment Method” and enter the details of your secondary card. This feature helps keep your ads running uninterrupted if there’s ever an issue with your primary card, such as insufficient funds or an expired card.
Step 5: Save and Review
Once you’ve added or edited your payment methods, make sure to review everything for accuracy. Ensure that your primary and backup cards are correct, and then save your settings.
And that’s it! Your Google Ads billing is now set up, and you’re ready to start running campaigns without worrying about payment issues.
Recap: How to Set Up Google Ads Billing
To sum up, if you’re looking to set up your billing in Google Ads, follow these easy steps:
- Go to “Tools and Settings” in the Google Ads navigation bar.
- Click on “Billing,” then “Summary.”
- Add or edit your debit or credit card under the “Payment Methods” tab.
- Optionally, add a backup payment method to ensure your ads continue running smoothly.
- Review and save your billing settings.
By following these steps, you’ll ensure that your payment process with Google Ads runs efficiently and that you avoid any unnecessary interruptions to your campaigns.

Speak with our Google Ads Expert
Got a quick question about setting Google Ads billing
to keep your Ads running? We can help.
Speak to one of our experts today on 01702 668207 or send us a message.